


The developer of RegCleaner, jv16 PowerTools, Uninstalr, WinFindr, Startup Timer, ScreenshotX, System Examiner and Windows Update Fixer.
If you’re trying to uninstall Skype for Business, you’ve likely discovered that it’s not as straightforward as removing a typical application. This is because some versions of Skype for Business are typically bundled with a Microsoft Office installation rather than existing as a standalone program.
In this guide, we’ll walk you through several proven methods to remove Skype for Business, starting with the simplest approaches and progressing to more comprehensive solutions.
Table of Contents
Skype for Business has been discontinued
Before we dive into removal methods, it’s worth noting that Microsoft officially retired Skype for Business Online on July 31, 2021, with the service fully transitioning to Microsoft Teams. While the paid support is extended until October 2029, Microsoft is actively encouraging all users to migrate to Teams for their communication and collaboration needs.
This is one of the main reasons many users are now looking to uninstall Skype for Business – it’s legacy software that’s no longer being actively developed or updated, yet it often remains installed as part of older Office packages or organizational deployments that haven’t completed their Teams migration.
Understanding different versions of Skype for Business
Skype for Business exists in several different versions, and knowing which one you have can help determine the best removal method.
The most common versions include Skype for Business 2016 (part of Office 2016), Skype for Business Basic 2016 (a free standalone version), and Skype for Business 2015 (included with Office 2013). There’s also the enterprise version that comes with Office 365 business edition (now Microsoft 365), and the on-premises Skype for Business Server deployment that some organizations still maintain.
Each version may have slightly different uninstallation requirements – standalone versions like Skype for Business Basic can typically be removed directly through Control Panel, while versions bundled with your Microsoft Office package require more specific approaches. You can check which version you have by opening Skype for Business, clicking the gear icon, and selecting “About Skype for Business.”
Important considerations before uninstalling
Before removing Skype for Business, consider these potential impacts:
- Outlook integration: Meeting scheduling features may be affected
- Third-party products: Applications that use Skype for Business APIs will lose that functionality
- Organizational requirements: Verify that your workplace doesn’t require Skype for Business for communication
Make sure you genuinely don’t need Skype for Business before removing it, as some applications may depend on it even if you don’t use it directly.
Why uninstalling Skype for Business requires special steps
Here’s what you need to know upfront: Skype for Business is typically integrated into your Microsoft Office package. This means you can’t always uninstall it like a standard application without taking additional steps.
This applies to several Office versions, including:
- Office 2016
- Office 365 (now Microsoft 365)
- Office 365 business edition
- Skype for Business 2016
- Skype for Business Basic 2016
Microsoft bundles Skype for Business with various Office components, which means the removal process depends on how your Microsoft Office 2016 or newer version was originally installed and configured.
How to uninstall Skype for Business
Method 1: Using Control Panel or Apps and Features
Let’s start with the most straightforward approach, though it’s important to note this works only in specific scenarios.
For Windows 10:
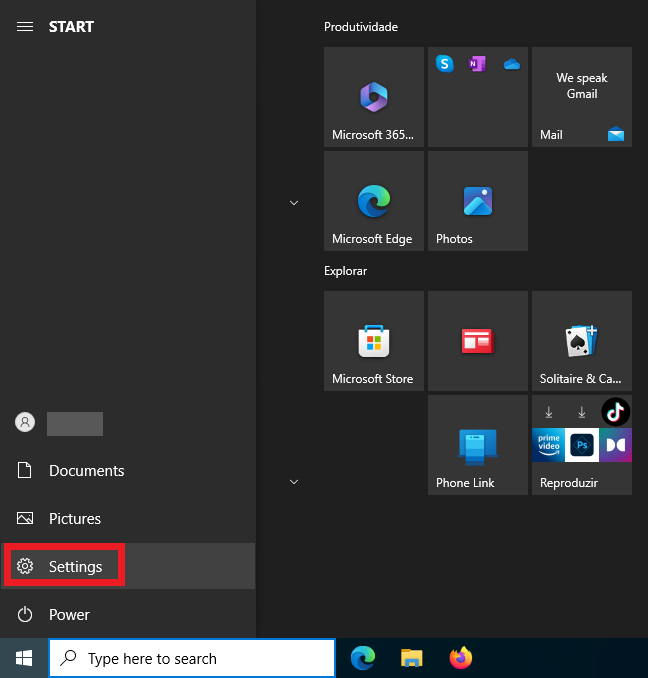
- Open Settings
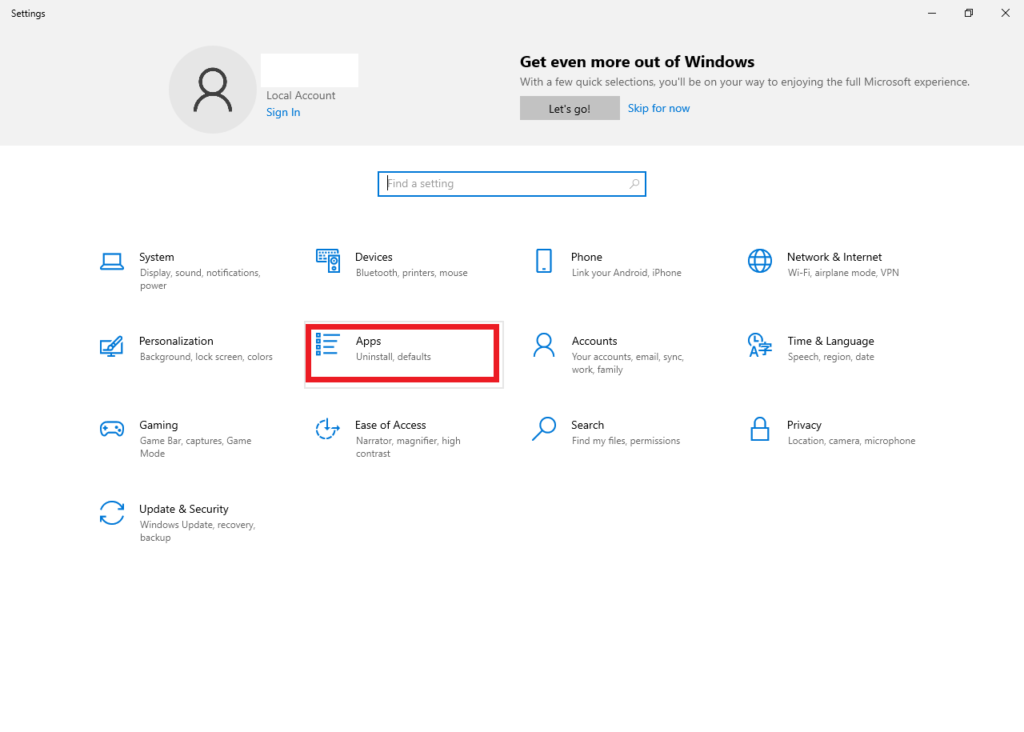
- Navigate to Apps > Apps & features
- Locate Skype for Business in the list
- Right-click and select Uninstall
For Windows 11:
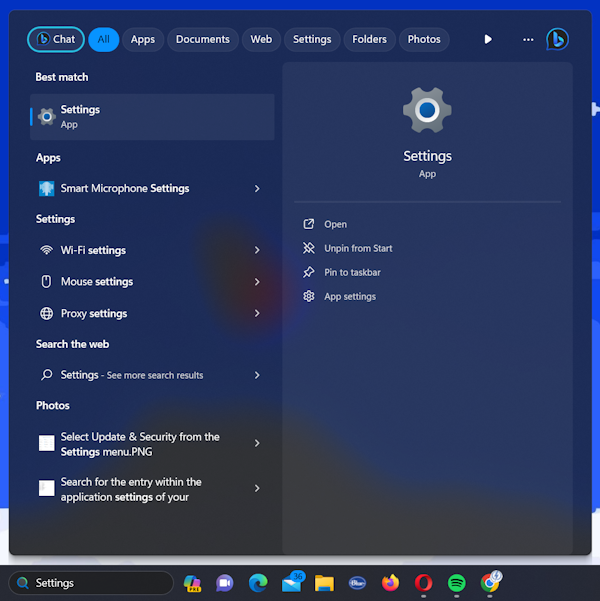
- Open Settings
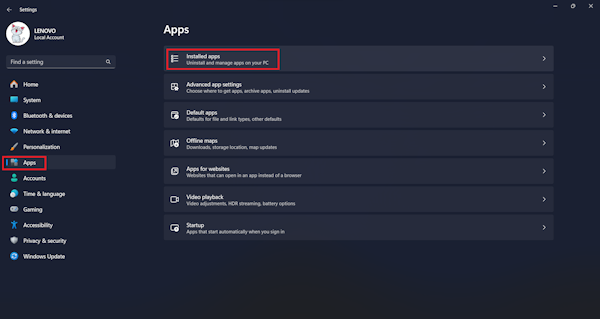
- Go to Apps > Installed apps
- Find “Skype for Business”
- Click Uninstall
If Skype for Business appears as a separate entry and uninstalls successfully, you’re all set. However, many users find that Skype for Business doesn’t appear as a standalone item because it’s embedded within the Office suite.
Method 2: Using the Office Deployment Tool
This is Microsoft’s recommended solution for selectively removing Office components. While it requires a few technical steps, it’s supposed to be reliable and won’t affect your other Office applications. You’ll need the following to use this method:
- The Office Deployment Tool (available from Microsoft)
- A text editor
- Administrative access to your computer
Here’s how:
Step 1: Download the Office Deployment Tool
Visit Microsoft’s website and download the Office Deployment Tool. When you run the executable, it will extract the necessary files to a folder of your choice.
Step 2: Create a Configuration File
You’ll need to create an XML configuration file that instructs the Office Deployment Tool to remove Skype for Business. Here’s a sample configuration:
<Configuration>
 <Remove>
   <Product ID="SkypeforBusinessEntryRetail">
     <Language ID="en-us" />
   </Product>
 </Remove>
</Configuration>
Save this file as “uninstall-skype.xml” in the same folder where you extracted the Office Deployment Tool.
Important note about Product ID: The Product ID varies depending on your specific Office installation. Common variations include SkypeforBusiness2016Retail or SkypeforBusinessRetail. You can verify your current configuration by checking your Office installation details or consulting Microsoft’s documentation.
Step 3: Execute the Removal
Open Command Prompt as Administrator, navigate to the folder containing the Office Deployment Tool, and run:
setup.exe /configure uninstall-skype.xml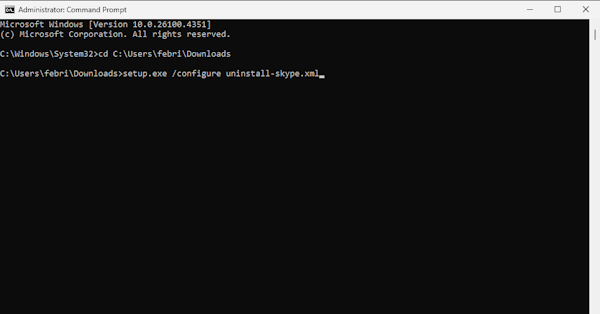
This command should remove Skype for Business while preserving the rest of your Microsoft Office installation. If this doesn’t work, you should try another alternative method.
Method 3: Reinstalling Office without Skype for Business
In some cases, the most effective solution is to reinstall your Office suite without including Skype for Business. Here’s the recommended process:
- Sign out of all Office applications (File > Account > Sign out)
- Close all Microsoft Office programs
- Verify in Windows Task Manager that no Office processes are running
- Uninstall Microsoft Office completely via Control Panel or Apps and Features
- Restart your computer
- Reinstall Office from your Microsoft 365 account, using the Office Deployment Tool to exclude Skype for Business during installation
Keep in mind that you’ll need to reconfigure your Office settings after reinstallation using this method.
Method 4: Using third-party uninstaller software
For users who prefer a more automated solution, third-party uninstaller tools can simplify this process significantly.
Full disclosure: I develop Uninstalr, so I have a vested interest here. However, I believe in being transparent about why specialized uninstaller tools exist.
A quality third-party uninstaller can:
- Detect Skype for Business even when it’s integrated into your Office installation.
- Attempt to remove it cleanly without affecting other Office components.
- Clean up leftover registry entries and files.
- Eliminate the need to edit XML files or work with the Command Prompt.
Here’s how you can uninstall Skype for Business using Uninstalr:
- Back up your important data as a safety precaution.
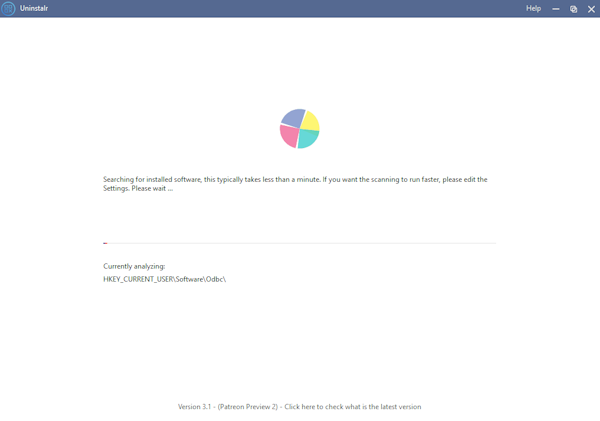
- Run Uninstalr, this will automatically prompt a system scan. Wait until the scan process finishes.
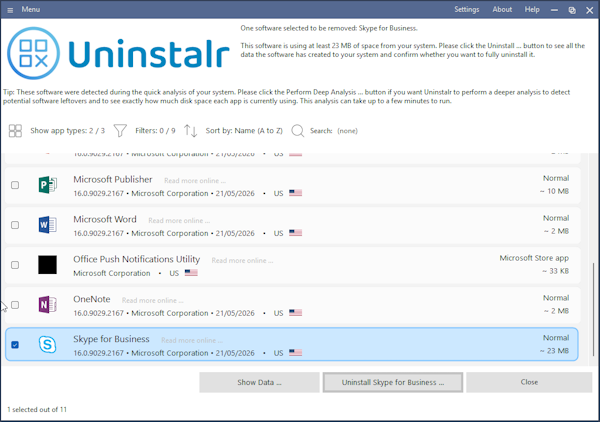
- In the new screen, look up “Skype for Business” in the list of installed apps. Click the name from the list and then hit the “Uninstall” button.
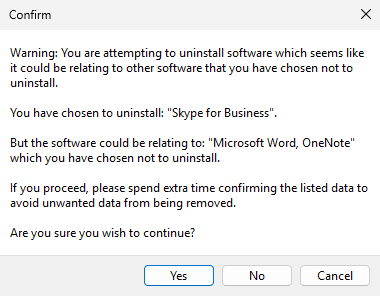
- A new warning will pop up. Review the message carefully and click “Yes” if you want to proceed with uninstallation.
- Uninstalr will analyze the system and look for all data related to Skype for Business.
- Once it’s done, a new screen will appear. Here you can review the data that will be removed after uninstallation. Please review the list carefully. You can exclude any data that shouldn’t be removed by Uninstalr by deleting it from the list.
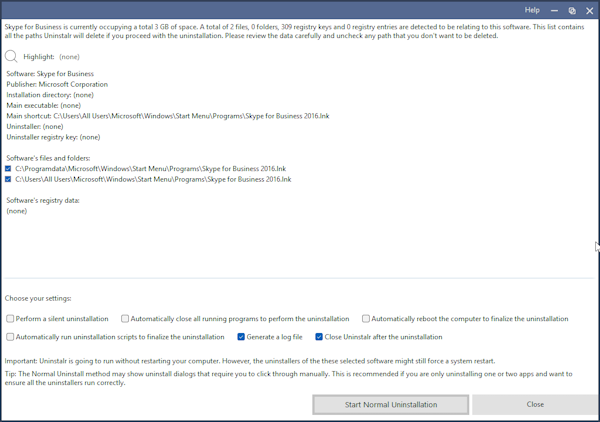
- You can also review what Uninstalr should or shouldn’t do during the uninstallation by ticking and unticking the options under the list. If everything looks good, you can click the “Start Uninstallation” button to begin the uninstallation process.
- A new warning will pop up to make sure that you’ve created a backup, reviewed the data carefully, and applied the appropriate options on what Uninstalr should and shouldn’t do. Please review the list carefully and only proceed when you’re okay with all of these. When everything looks good to you, click the “Yes” button to proceed.
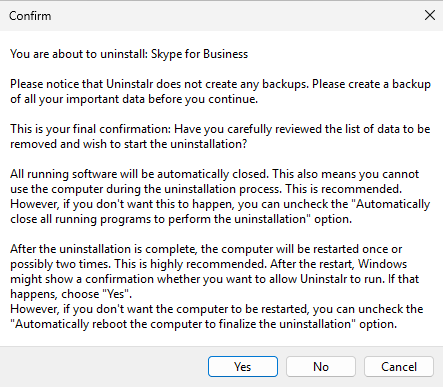
- Uninstalr will start the uninstallation process. Wait until this finishes. If you tick the “Automatically restart the computer” option, your computer will restart two times after uninstallation to ensure all of the data has been successfully removed.
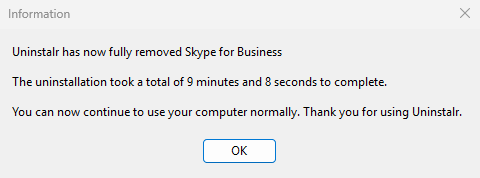
- When the uninstallation process completes, Uninstalr will give a heads-up that Skype for Business has been removed.
Whether you choose Uninstalr or another reputable uninstaller is up to you. I recommend reviewing these benchmark tests to make an informed decision.
Summary
The process of uninstalling Skype for Business varies in complexity depending on your installation type. For standalone installations, removal through Control Panel or Apps and Features is straightforward. For bundled installations (which are more common), removal is more complicated, and there are various methods you can try, such as using the Office Deployment Tool, reinstalling Office without Skype for Business, or uninstalling using a third-party software like Uninstalr.
If you find this article useful, please help us gets discovered by new people by sharing it on Reddit, your favorite tech forum, or to your friends, family, and people you meet at a party.