


The developer of RegCleaner, jv16 PowerTools, Uninstalr, WinFindr, Startup Timer, ScreenshotX, System Examiner and Windows Update Fixer.
So you have decided to uninstall Steam client and now you’re looking for the proper way to remove it for good from your Windows system.
As you may know, Steam isn’t the most difficult app to uninstall from Windows, but you do need to pay extra attention if you don’t want to lose important data during uninstallation.
This article will guide you through the essential steps required before uninstallation and give alternative methods to uninstall Steam.
Table of Contents
Before you uninstall: important considerations
- Please note that uninstalling the Steam client using its built-in uninstallation tool will also remove all of your installed Steam game content. If you want to remove the Steam app while keeping your Steam game data intact, you need to move the steamapps folder (C:\Program Files (x86)\Steam\steamapps) outside of the Steam directory before uninstallation. In addition, you can also back up your Steam games and make use of the Steam Cloud feature.
- By uninstalling the Steam client, you’ll also be deleting the folder where Steam is installed. If, for any reason, you installed Steam to a folder which contains other data (e.g, you’ve installed Steam on C:\Program Files (x86)\ instead of C:\Program Files (x86)\Steam), then you should only manually remove Steam files instead of doing an uninstallation. Steam Support has a page that contains instructions to do so.
- Always create a backup of your important data before uninstallation. This is to ensure that you will have copies of your important data in case something goes wrong during uninstallation.
How to uninstall Steam on Windows
There are different methods you can try to uninstall Steam client / Steam application. Read below to see which one suits you the most.
Uninstall Steam client from Windows Settings
Here’s how you can uninstall Steam client from Windows Settings on Windows 11:
- Log out of your Steam client.
- Open Windows Settings by hitting the Windows button + I or clicking the Windows button > select Settings.
- From the left menu, select “Apps” > select “Installed apps”.
- Look up “Steam” in the search box.
- When you find Steam from the search results, click the three dots next to the app name > select “Uninstall” > click the “Uninstall” button to confirm uninstallation.
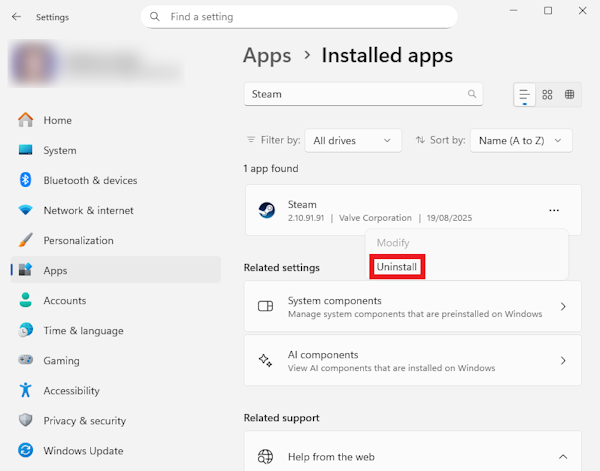
- Follow the prompts from the uninstallation wizard to finalize the uninstallation process.
Uninstall Steam client from the Control Panel
- Open Control Panel by typing in “Control Panel” in the Windows search bar > click on the search results.
- Under the Programs menu, select Uninstall a program.
- Look up Steam from the list of installed programs. Once you find it, double-click to uninstall.
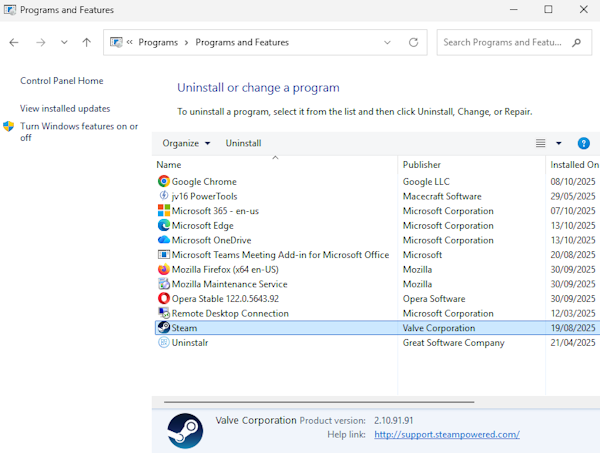
- Wait until the uninstallation process completes.
Uninstall Steam client using a third-party uninstaller
Though uninstalling Steam using Windows’ built-in uninstaller is the most common method that people use, it still has its downsides. The main downside is that the above method doesn’t completely remove all of the Steam software files. Over time, these leftovers could clog your system and slow down your computer.
This is why we’d like to propose another method: uninstall using a third-party uninstaller like Uninstalr. Here’s how.
- Back up your important data as a safety precaution.
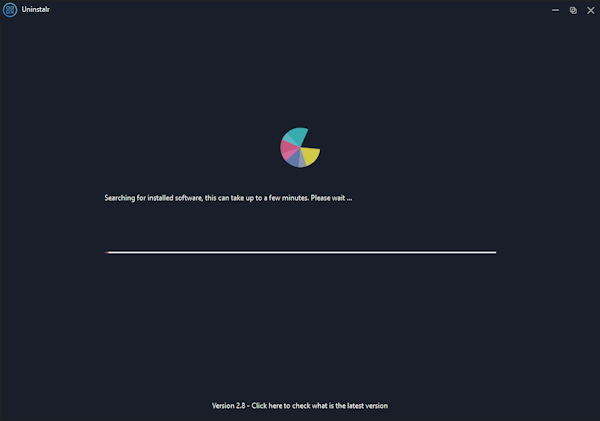
- Run Uninstalr, this will automatically prompt a system scan. Wait until the scan process finishes.
- In the new screen, look up “Steam” in the list of installed apps. Click the name from the list and then hit the “Uninstall” button.
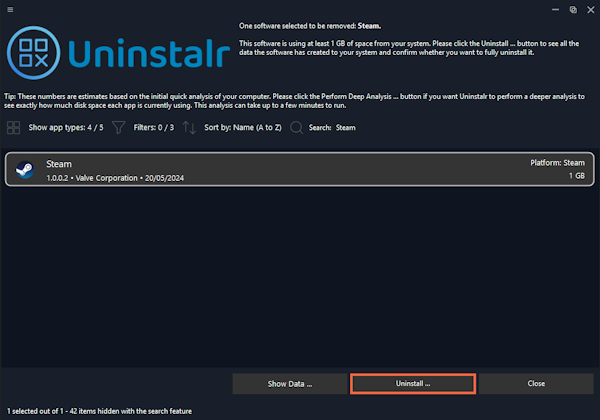
- Uninstalr will analyze the system and look for all data related to Steam.
- Once it’s done, a new screen will appear. Here you can review the data that will be removed after uninstallation. Please review the list carefully. You can exclude any data that shouldn’t be removed by Uninstalr by deleting it from the list.
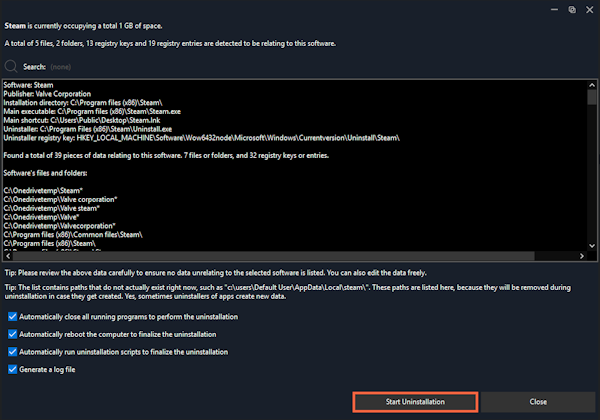
- You can also review what Uninstalr should or shouldn’t do during the uninstallation by ticking and unticking the options under the list. If everything looks good, you can click the “Start Uninstallation” button to begin the uninstallation process.
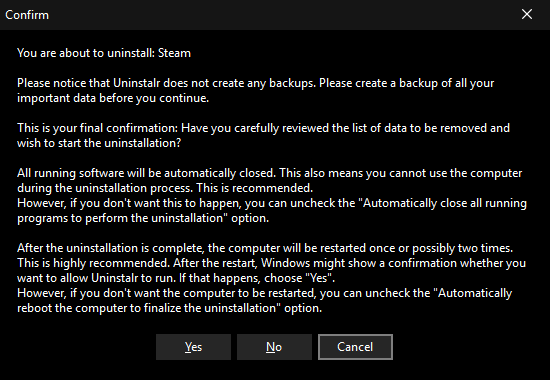
- A new warning will pop up to make sure that you’ve created a backup, reviewed the data carefully, and applied the appropriate options on what Uninstalr should and shouldn’t do. Please review the list carefully and only proceed when you’re okay with all of these. When everything looks good to you, click the “Yes” button to proceed.
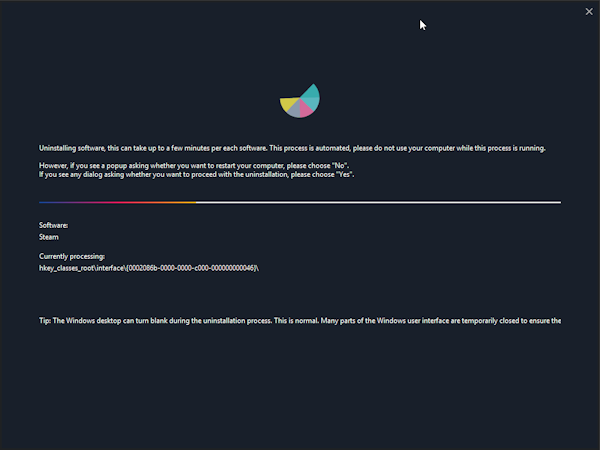
- Uninstalr will start the uninstallation process. Wait until this finishes. If you tick the “Automatically restart the computer” option, your computer will restart two times after uninstallation to ensure all of the data has been successfully removed.
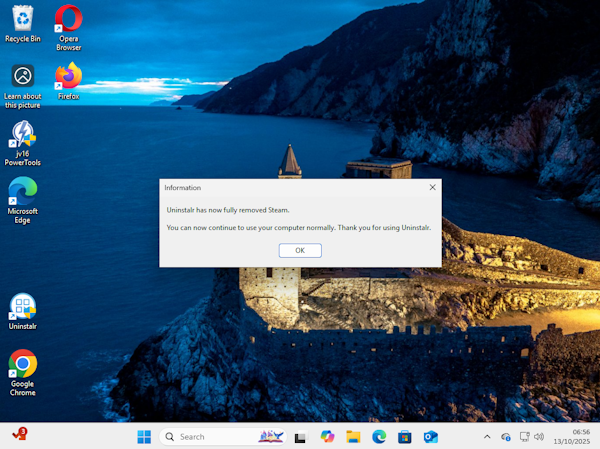
- When the uninstallation process completes, Uninstalr will give a heads-up that Steam has been removed.
Reinstalling Steam after uninstallation
If you’d like to reinstall Steam after uninstallation, you can easily do so. All you need to do is download Steam from its official page and follow the instructions from the installation wizard.
If you have enabled Steam Cloud or created a backup of your Steam games, you won’t lose your downloaded games and your game progress after uninstallation. Also, if you have purchased a game in the past, your purchase will be honored, and you won’t need to pay again.
Conclusion
The steps to uninstall Steam client aren’t really complicated, but you do need to pay attention before uninstallation if you want to keep your game collection and important data intact.
The most common way to uninstall Steam is to use Windows’ built-in uninstallation tools. But, typically, this method leaves leftovers and junk files after uninstallation, which will clog and slow down your system over time.
This is why in this article we propose another alternative: Uninstalr. Uninstalr is a lightweight and easy-to-use tool to uninstall software in Windows. With Uninstalr, you can rest assured that there are little to no leftover remains after uninstallation. You still need to create a backup and carefully review the items that will be deleted as safety precautions, though.
You can download Uninstalr for free from this link: https://uninstalr.com/ to see it by yourself!