


The developer of RegCleaner, jv16 PowerTools, Uninstalr, WinFindr, Startup Timer, ScreenshotX, System Examiner and Windows Update Fixer.
Teams or Microsoft Teams is a communication and collaboration tool developed by Microsoft. This app is available for download from its official site or Microsoft Store. In Microsoft’s infinite wisdom, they release Teams as a free app and also as paid apps (mainly for big and small businesses, and schools) basically under the same name with slight variations. This is very clear and not confusing for users at all.
Teams is also a little bit tricky to uninstall. Teams would sometimes reinstall itself after uninstallation, and if you uninstall Teams from Windows, typically there are still leftovers remaining which will slow down your computer over time. You’ll need an alternative to effectively uninstall Teams for good, which we’ll discuss later in this article.
Read more to find the detailed step-by-step guide to uninstall Teams from Windows 11.
Table of Contents
How to uninstall Teams from Windows 11
There are different ways for you to uninstall Teams, such as using Microsoft’s built-in uninstaller from Settings or Control Panel, using PowerShell script, or using a trusted third-party uninstaller such as Uninstalr.
Microsoft recommends users uninstall both Microsoft Teams and Microsoft Teams Meeting Add-in for Microsoft Office to prevent Teams from reinstalling itself after uninstallation.
Uninstalling Teams from Windows Settings
Follow these step-by-step instructions to uninstall Teams via Windows Settings:
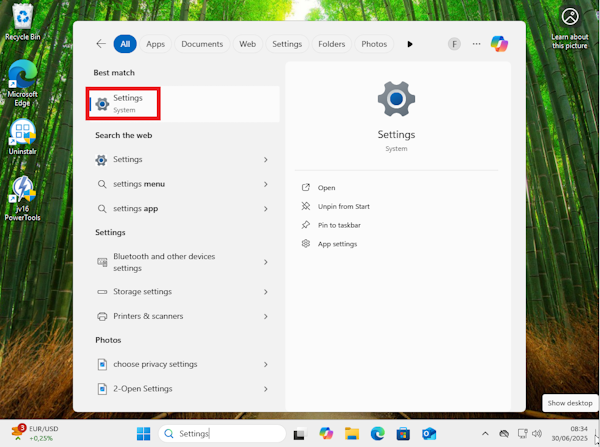
- Open the Settings menu by looking up “Settings” from the Windows search bar > click from the search results.
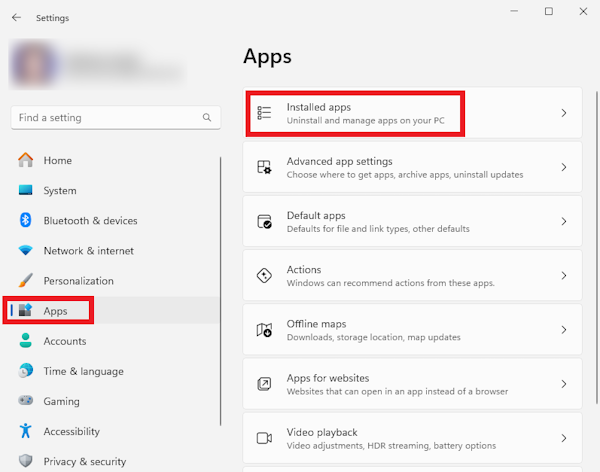
- In the new window, select the Apps menu from the left sidebar > select Installed Apps.
- Look up “Microsoft Teams” from the search bar.
- Click the three dots next to the ‘Microsoft Teams’ name > select Uninstall > click the Uninstall button again to confirm.

- Look up “Microsoft Teams Meeting Add-in for Microsoft Office” from the search bar.
- Click the three dots next to the ‘Microsoft Teams Meeting Add-in for Microsoft Office’ name > select Uninstall > click the Uninstall button again to confirm.

Uninstalling Teams from the Control Panel
Follow these step-by-step instructions to uninstall Teams from the Control Panel:
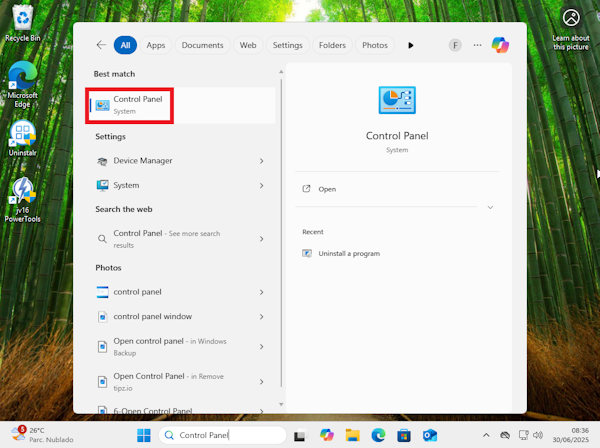
- Open Control Panel by looking up “Control Panel” from the Windows search bar > click from the search results.
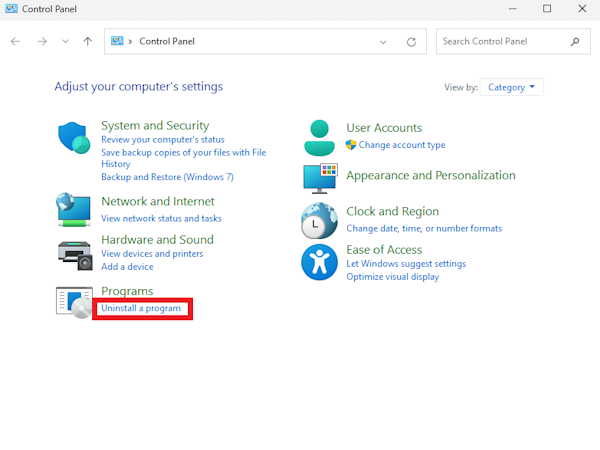
- In the new Control Panel window, select the uninstall option (Uninstall a program) under the Programs menu.
- In the new Programs and Features window, search for Microsoft Teams Meeting Add-in for Microsoft Office from the list of installed apps > when you find it, double-click the app name to uninstall.

- A new warning pop-up will appear, select “Yes” to confirm the uninstallation. Wait until the uninstallation process finishes.
Note: In both the virtual machine and real machine running Windows 11 that we used for testing, Programs and Features didn’t have Microsoft Teams in the list of installed apps.
Uninstalling Teams from PowerShell
Disclaimer: Using PowerShell incorrectly could potentially cause issues with your system. Please proceed carefully at your own risk. If you don’t know what you’re doing, you can skip this step.
You can follow these step-by-step instructions to uninstall Teams from PowerShell. You can also use the same command to uninstall Teams from Command Prompt if you prefer.
- Open PowerShell by looking up “PowerShell” from the Windows search bar > right-click from the search results. You need to make sure that you run this as an Admin.
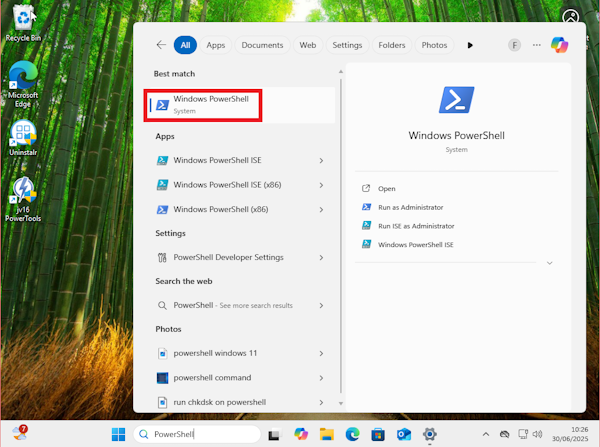
- Type in the following command to check the Teams version available on your system and hit Enter.
winget list teams
- Type in the following command to uninstall Teams and hit Enter.
winget uninstall --id Microsoft.Teams
- Wait until the uninstallation process finishes and restart your computer to make sure Teams has been successfully uninstalled.

Uninstalling Teams using Uninstalr
If you want a straightforward way to uninstall Teams, you can opt for a trusted third-party uninstaller such as Uninstalr. With Uninstalr, you can easily uninstall Teams with a few clicks, and you don’t need to manually delete leftovers after uninstallation. Here’s how you can uninstall Teams using Uninstalr:
- Back up your important data as a safety precaution.
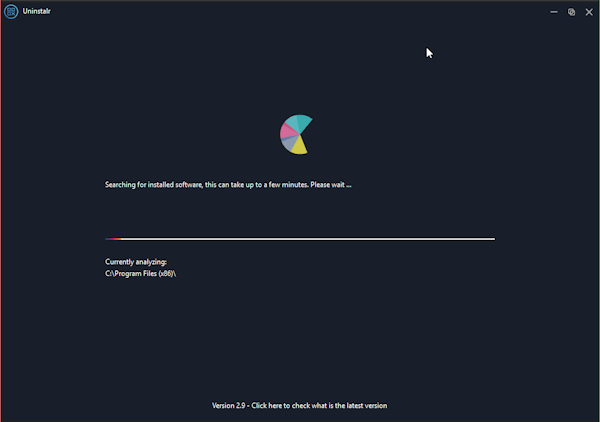
- Run Uninstalr, this will automatically prompt a system scan. Wait until the scan process finishes.
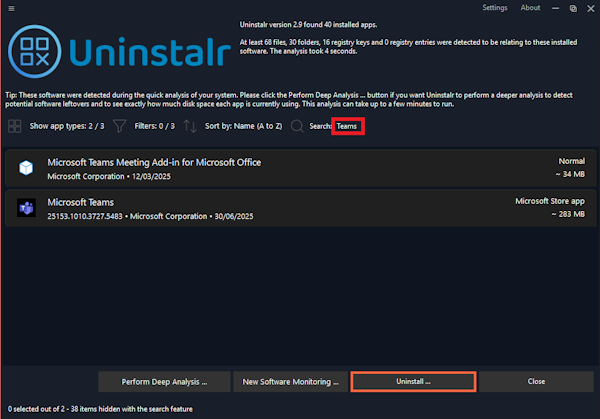
- In the new screen, look up Teams in the list of installed apps. Click the name from the list and then hit the “Uninstall” button.
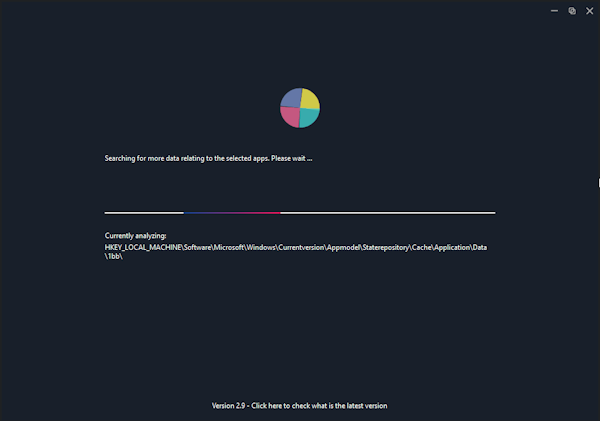
- Uninstalr will analyze the system and look for all data related to Teams.
- Once it’s done, a new screen will appear. Here you can review the data that will be removed after uninstallation. Please review the list carefully. You can exclude any data that shouldn’t be removed by Uninstalr by deleting them from the list.
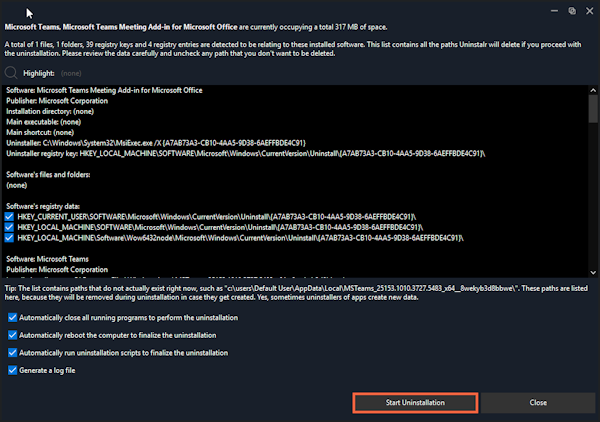
- You can also review what Uninstalr should or shouldn’t do during the uninstallation by ticking and unticking the options under the list. If everything looks good, you can click the “Start Uninstallation” button to begin the uninstallation process.
- A new warning will pop up to make sure that you’ve created a backup, reviewed the data carefully, and applied the appropriate options on what Uninstalr should and shouldn’t do. Please review the list carefully and only proceed when you’re okay with all of these. When everything looks good to you, click the “Yes” button to proceed.

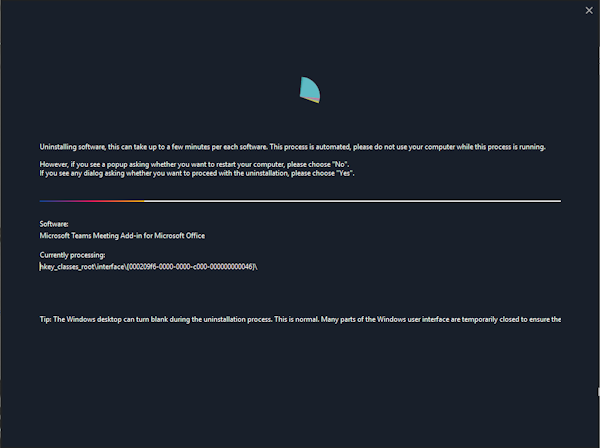
- Uninstalr will start the uninstallation process. Wait until this finishes. If you tick the “Automatically restart the computer” option, your computer will restart two times after uninstallation to ensure all of the data has been successfully removed.
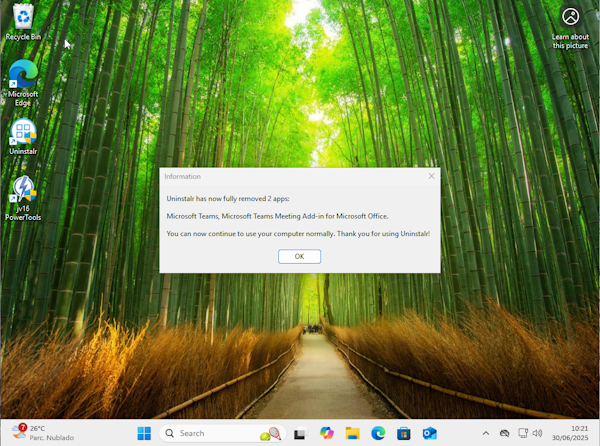
- When the uninstallation process completes, Uninstalr will give a heads-up that Teams has been removed.
Conclusion
Microsoft Teams is a rather annoying app to uninstall. Not only does it come pre-installed in Windows 11, it might also come back reinstalling itself after uninstallation if you don’t remove the additional app, Microsoft Teams Add-in for Microsoft Office that comes with it (which for some reason isn’t detected in Programs and Features). You can uninstall Microsoft Teams from Windows Settings, Control Panel, or using a PowerShell script, but these methods would still leave leftover files which could pile up and slow down your computer system over time.
Uninstalr is a great alternative to uninstall Teams for good and remove all of the remaining leftovers after uninstallation. With a few clicks, you can make sure that Teams is fully uninstalled and won’t come back from the death. As safety precautions, you need to make sure that you have created a backup and carefully reviewed the items that will be deleted before uninstallation.
Uninstalr is available as Setup and Portable versions and you can download Uninstalr for free from https://uninstalr.com/